Product photography for Iraq online stores: a practical phone workflow
Product photography can start with a phone, window light, and a repeatable shot list. Learn how an Iraq shop can make accurate product images and publish them clearly.

Product photography for a small Iraq online store starts with a stable phone, soft window light, a plain background, and a short shot list for each product. Photograph the exact item and its variants, check colour and details against the physical product, then upload clear images that work on mobile. A repeatable process matters more than an expensive camera.
01
Product photography for Iraq online stores: a practical phone workflow
Quick answer: Product photography for a small Iraq online store can begin with a phone on a steady support, soft window light, a plain backdrop, and four useful views of the real item. Photograph the exact variant being sold. Check colour, size cues, labels, and included parts against the physical product before uploading. The goal is to answer a buyer's questions clearly on a mobile screen, not to make every product look like a luxury advertisement.
An online buyer cannot turn a bowl over, feel a jacket's fabric, or inspect a device's ports. The photograph carries some of that inspection work. A Baghdad home-goods seller and a Basra clothing shop will need different detail shots, but both benefit from the same repeatable process: prepare the item, fix the light and camera position, follow a shot list, review the result, and test the published page. The RA8M guide to opening an online store covers the wider store launch; this guide stays focused on the product images.
Takeaways: Keep the camera position and light consistent across a product group. Show the actual variant and at least one detail that could change a purchase decision. Edit for clarity, not to change the item. Name and describe the files accurately, check the crop on a phone, and compare buyer questions and returns after the images change.
02
What good product photography must show
Product photography answers a practical question: *what will arrive if I order this exact item?* A strong main photo makes the item obvious at thumbnail size. Supporting photos resolve uncertainty about dimensions, texture, colour, packaging, or use. For a kettle, show the whole kettle, lid, handle, and plug type where relevant. For shoes, show both sides, sole, material detail, and the actual colour of each listed variant. A pretty room scene can provide context, but it cannot replace a clear view of the thing being sold.
This is especially important when a shop copies a supplier image. The supplier may have photographed a different colour, package size, accessory bundle, or older model. Use a supplier image only when the permission and item match are clear, and verify the current stock yourself. A photo of a blue jacket must not silently stand for a black jacket if the colour selector changes only the text. Buyers should not have to guess whether the picture follows the selected size or colour.
A useful image also has enough visual consistency for comparison. Keep the camera height and main-image crop similar across a category. A customer comparing three lamps should not see one from directly above, one from across the room, and one as a tiny object surrounded by props. Consistency is not sameness: each product still needs the angles that explain its particular features. Shopify's product photography guidance recommends a stable camera position, a simple background, and multiple angles so customers can see the product clearly.
Do not promise a conversion increase from photography alone. Price, delivery fees, stock availability, description accuracy, checkout, and trust all influence orders. Images can remove uncertainty, but they cannot repair a broken delivery promise. Define what a better photograph should achieve for one category: fewer colour questions for clothing, fewer size misunderstandings for containers, or clearer included parts for electronics. That specific question will shape the shot list and later review.
03
Build a repeatable product photography setup with a phone
Choose a table near a window with indirect, steady daylight. Put the window to one side of the product and switch off a strong ceiling bulb if it creates a second colour cast. A white card opposite the window can lift shadows; a black card can define the edge of a white object. Shopify's step-by-step setup describes a window, tripod, plain sweep, and reflector as a workable small-space kit. You can make the sweep from clean white card curved from table to wall. A cream or light-grey sheet may be better for a shiny white product if it keeps the edge visible.
Clean the lens, the item, and the surface. Dust on a dark kettle or fingerprints on a phone become obvious in close photos. Remove price stickers that are not part of the delivered item, but retain model and safety labels where those labels matter to the buyer. Check that batteries, cables, lids, and other accessories in the frame are actually included. If they are only props, remove them from the main photo and explain them in any lifestyle shot.
Stabilize the phone with a tripod or firm support. Lock focus on the product and take a test frame before photographing the whole range. Avoid digital zoom when moving the camera closer will preserve more detail. Keep the product away from the backdrop so harsh shadows do not merge with its outline. Photograph a white item against a background that gives it a visible edge. The correct arrangement depends on the material: matte fabric absorbs light; polished metal and glass reflect the room and may need a larger soft light source or a different camera angle.
Make one small reference card for each product group: table position, camera height, backdrop, light source, and approximate distance. Photograph that setup once and keep it with the shop's image folder. Staff can then reproduce the appearance when new stock arrives. A Basra seller may shoot in a different room during the hot season or at a different time of day; the reference card helps spot a changed light source before a whole batch acquires a yellow or blue cast. It is a process aid, not a demand for laboratory-perfect lighting.
For a shop that sells hundreds of products, start with high-traffic or high-confusion items rather than buying equipment for every SKU. Photograph ten items using the same setup, load them into draft product pages, and inspect those pages on a phone. If text on packaging is too small, add a detail shot. If the object looks tiny in the listing card, adjust the composition before repeating the shoot. If colours change from frame to frame, control the light before editing individual files.

04
Make a shot list for the actual item and its variants
A shot list prevents the main operational mistake: finishing a beautiful session without the one view a buyer needed. Write the SKU, model, colour, size, and included parts at the top of the session sheet. For a simple household item, capture a clean front or three-quarter main view, one alternate angle, one feature detail, and a scale cue when dimensions are hard to imagine. For apparel, capture front, back, fabric texture, and fit or measurement context; repeat the main view for each sold colour. For electronics, show ports, included accessories, model marking, and the exact package contents.
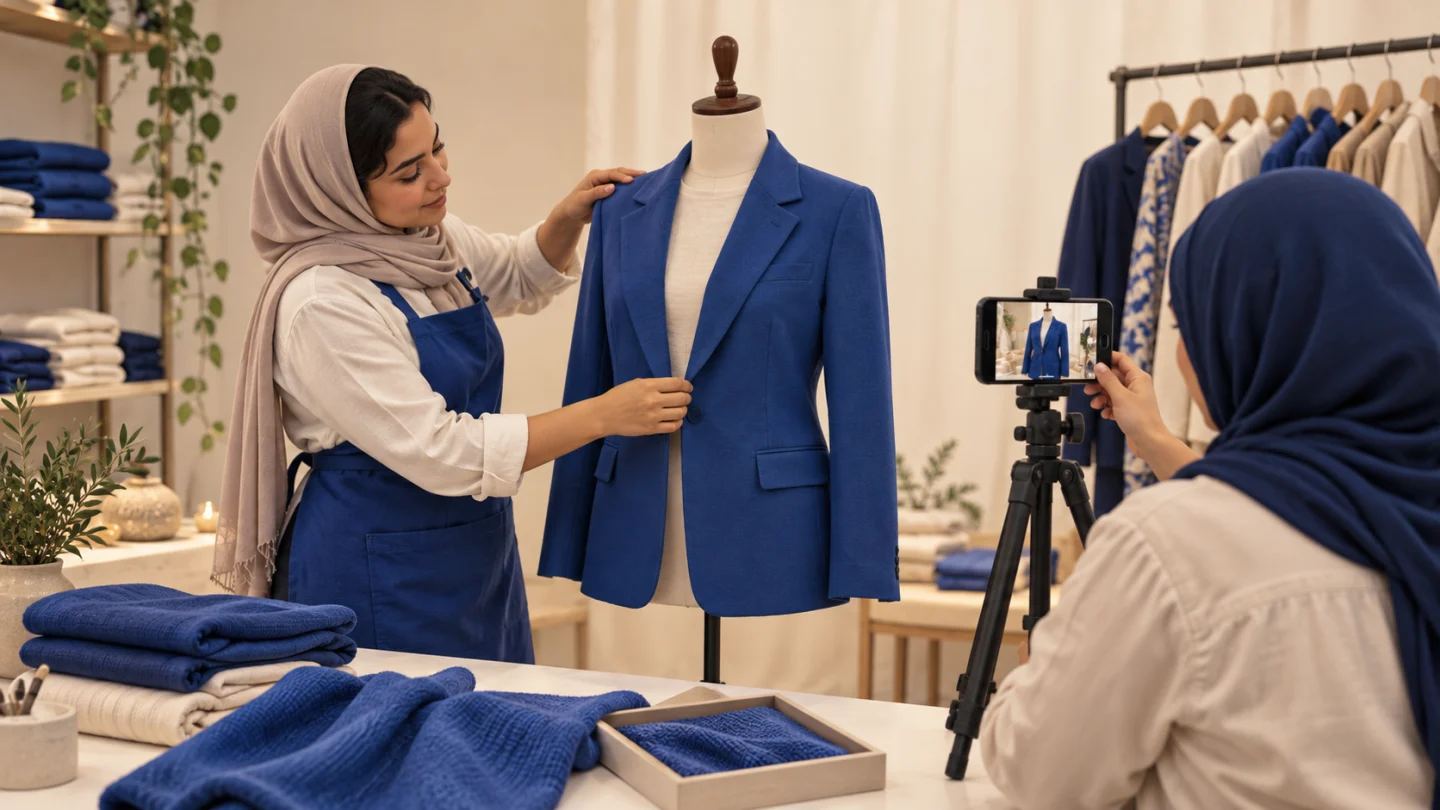
Take the main picture first while the set is clean, then rotate the product or camera for supporting views. Keep a marker outside the frame to preserve position if you need to replace a product. Do not assume one angle fits every category. A flat garment on a table can show fabric and stitching, but a mannequin may better explain its shape. A ceramic bowl's top view reveals depth; a side view reveals height. A phone case requires a clear view of its cut-outs and model compatibility, not a distant lifestyle picture.
A scale photo can help when dimensions are unfamiliar, but the comparison object must itself be recognizable and should not imply that it is included. Better still, write measured dimensions in the product description. The photo supports the measurement; it does not replace it. Where an item is handmade or stock varies slightly, explain the range honestly. Photograph the exact item for one-off listings. For repeat inventory, define which details can vary and retake pictures when the delivered batch materially changes.
Keep a folder naming rule such as `sku-colour-view-version.webp`. This lets a team find the correct view without guessing from a long line of camera filenames. Save originals separately before making web versions, because aggressive cropping or compression cannot restore a missing detail. Record who approved the image set and which stock batch it represents. That may sound excessive for a small shop, but a two-column sheet with SKU and image status can prevent uploading a photo of an old model after a supplier replacement.
| Product type | Main view | Most useful additional proof | Common misleading shortcut |
|---|---|---|---|
| Ceramic bowl or container | Entire item against a plain backdrop | Inside, base, rim, and scale beside a neutral object | A large close-up that hides true size |
| Jacket or shoes | Actual colour and shape | Back, texture, sole or stitching, size context | One supplier image reused for every colour |
| Small appliance | Full device and supplied parts | Controls, plug, capacity marking, packaging | Showing accessories that are not included |
| Handmade item | Exact piece or representative listing clearly labeled | Variation in finish and dimensions | Cropping out natural variation or defects |
05
Review and edit without changing what the buyer receives
After the shoot, compare the photo with the physical item under neutral light. Ask a staff member who did not take the picture to identify the colour, included parts, and any visible defects. If the screen makes a navy jacket look black, correct the lighting or white balance before publishing. Minor exposure and background cleanup are reasonable; reshaping the item, deleting a meaningful flaw, or inventing a material finish is not. The final image must remain a fair representation of the sold item.
Crop with the destination in mind. A wide blog banner, a square catalog tile, and a portrait social post need different framing. Keep an uncropped master, then export versions for the places the shop actually uses. The main store image should remain clear when a listing card trims its edges. Check both the category grid and the full product page. Shopify's media guidance notes that consistent aspect ratios help featured product images display at a consistent size; the exact theme crop still needs a visual check.
Do not mistake sharpness for usefulness. A macro photograph of stitching may be crisp but useless if the buyer cannot see the full jacket. A lifestyle image may make a lamp attractive but leave its plug or dimensions unclear. Arrange the gallery from the buyer's perspective: identify the item, understand its scale, inspect a decision-critical detail, then see it in context. If a product has selectable variants, test the gallery while switching variants on a phone. If the images do not change as expected, make the mismatch visible in the description or correct the listing setup.
Be careful with AI cleanup. Removing a distracting background can be harmless when product edges remain true. Generating a room around a real product can help explain use, but it may falsely suggest a size, finish, or accessory. Do not use generated pictures as the sole evidence for a product that buyers expect to match exactly. Where the image is illustrative, label it nearby. Review reflections and shadows, too: an impossible reflection or missing cable can make the item appear different from the one in the box.

06
Prepare product images for the store and Google
Export a web copy with a sensible file size while retaining the details shoppers need. Test loading on a normal mobile connection, not only on an office laptop. A blurry 40 KB picture and an unnecessarily huge original file are both poor choices. Keep the master image, use a supported format such as JPEG or WebP for the store, and verify that the uploaded file still shows labels and texture at the displayed size. Shopify's photography instructions specifically advise optimizing and resizing for the web without over-compressing.
If the shop submits a product feed to Google Merchant Center, its current image-link specification is a separate publishing check. The image URL must point directly to a crawlable image file, and Google distinguishes the primary product image from additional angles. Google announced a minimum 500 × 500 pixel requirement across categories beginning 31 January 2027; check the live specification before preparing a new feed. The main Merchant image must not contain price banners, promotional text, or a watermark. A store may use styled campaign graphics elsewhere, but those graphics should not silently replace a compliant main feed image.
Write alt text that identifies the meaningful item and view. “Blue ceramic bowl, front view showing painted rim” is useful; “best cheap online shopping Iraq blue bowl discount” is not. W3C's informative-image guidance says the text alternative should convey the image's meaning in context. If a detail shot reveals a label or connection that the body text does not explain, include that information in the alt or nearby visible description. Use the language of the page: an Arabic product page needs natural Arabic descriptions, not a pasted English keyword list.
Open every image URL after upload. Check that the product page uses the right variant, the thumbnail is not clipped, the file resolves without a login, and the image still looks correct when zoomed. Avoid reusing a generic filename such as `image1.jpg` for unrelated products. A descriptive filename helps staff maintain the catalog and makes a broken image easier to trace. The RA8M online-store page describes the storefront offering; confirm its current image upload and crop controls in the actual account before designing an entire production workflow around an assumed feature.

07
Measure whether the new photos answered buyer questions
Choose a small group of products before changing images. Record each listing's current images, page visits, completed orders, return reasons, and common customer questions for a comparable period. Then update the image set and watch the same signals. A drop in “Is this the real colour?” messages is meaningful even if the number of orders is too small for a reliable conversion comparison. A single week with a promotion or stockout is not a clean before-and-after test, so annotate those events.
Review one buyer journey rather than a dashboard total. Did people reach the product page but ask for another angle on WhatsApp? Did a size-related return follow a photo that lacked measurements? Did the category card crop out the item? Those observations suggest concrete fixes. The guide to selling products online in Iraq covers the broader order and delivery process; a photo review should keep its narrower focus on product understanding. When the same question recurs, add the answer to a photo, caption, or product description according to which form explains it best.
For a low-volume shop, avoid declaring that the new images “increased conversion” after two or three orders. Compare similar periods and keep price, stock, delivery offer, and traffic source in view. A photography improvement may help, but a simultaneous discount may have driven most of the change. If returns fall, inspect whether the reason coding is consistent. If customer questions rise, this could mean more people are viewing the item rather than that the images are worse. Use a simple monthly review to decide which product group to reshoot next.
A useful production target is operational, not a vanity score: every active SKU has a correct main view, every variant shows its real colour, every high-risk detail has a supporting view, and every listing passes a mobile check. The target can be audited by staff. It also makes the next product launch faster because the shot list and file naming rule already exist. The professional online store guide discusses catalog and store operations that sit around this image workflow.
08
Limits and mistakes worth checking before another shoot
A phone setup cannot solve every visual challenge. Jewelry, reflective metal, translucent glass, very dark fabric, and very small components can demand controlled lighting or specialized lenses. A merchant may reasonably outsource those products while keeping simple items in-house. Outsourcing is also sensible when staff time costs more than the photographs. Ask for a sample set, file ownership terms, and a list of delivered angles before committing a large catalog. A low-cost studio package that supplies only one glamorous image per SKU may not answer buyers' questions.
Be precise about safety and representation. Do not photograph a medicine, food, or electrical item in a way that hides expiration, warnings, seal condition, or an important label. This guide is a photography workflow, not a substitute for category-specific labeling or product rules. Ask the relevant specialist about legal or regulated claims. A product photo should not imply that a shop has official approval, compatibility, or included features it has not verified.
Avoid using another merchant's photos without rights and item verification. Avoid changing a product's colour until it looks more fashionable. Avoid a highly stylized main image that makes the object too small. Avoid a gallery full of nearly identical angles. Avoid publishing only desktop previews. Each of these errors wastes a different kind of trust. A short checklist and a second person's review catch most of them before a customer pays.
Finally, remember that photography is part of a maintained catalog. When a supplier changes packaging, a fabric batch shifts shade, or an accessory is no longer included, update the images and description together. Keep the old master file for the order history if needed, but do not leave an outdated photo on an active listing. Record the date and SKU of the change. A store with honest, current images is more useful to buyers than one with a large, perfectly styled gallery of yesterday's products.
09
Product photography questions from shop owners
Is a plain white background always best? It is a reliable starting point for a main catalog image because the item is easy to isolate. A slightly darker neutral background may reveal white edges better. Supporting lifestyle views can add context, provided the actual product remains identifiable. A Google feed may impose different main-image rules from a social post, so check the destination before choosing one visual for every channel.
Can I use a manufacturer's photograph? Only when you have permission and the photographed model, variant, packaging, and included parts match the stock you sell. Put your own verification and detail photos alongside it when customers need local proof. If a new shipment differs, update the gallery rather than relying on an old supplier file. An image that is legally licensed but materially inaccurate still misleads the buyer.
How often should I reshoot? Reshoot when the delivered item changes in a way the picture should show, or when repeated buyer questions reveal a missing view. A fixed calendar is less useful than a stock-batch and complaint trigger. Review high-selling and high-return items first. Keep a dated list of which SKU images were approved so an old file is not reused after a packaging or colour change.
What if the photo and product look different on some phones? Screens vary, so aim for a truthful neutral edit, not a promise of identical colour on every device. Compare the image with the item on more than one screen, state the colour plainly, and show texture and pattern in a detail shot. If a shade is especially sensitive, invite a customer to confirm before dispatch rather than making an unsupported exact-colour claim.
Primary sources: Shopify product photography instructions, Shopify product media guidance, Google Merchant Center image specification, and W3C informative-image guidance. Examples and workflow recommendations are editorial illustrations, not RA8M customer results or Iraq market averages.
10
Conclusion: a repeatable image set beats an expensive one-off shoot
Product photography works for an Iraq online store when it makes the *actual* item easier to judge. Start with one stable setup, a category-specific shot list, and a second-person accuracy check. Publish a clear main image plus the views that resolve the buyer's likely doubts, then test the product page on mobile and update the pictures when stock changes. Equipment can improve the result later; consistency and truthful representation are the first investment.
Frequently asked questions
What is product photography for an online store?
Product photography is the planned creation of images that show the actual item a customer may buy, including its shape, colour, scale, and important details. For an online store, the images should help a customer understand the product accurately rather than merely decorate the page. A repeatable setup and shot list help keep different items comparable.
Can I take product photos with a phone instead of a camera?
Yes. A current phone can be sufficient when the product is clean, light is soft, the camera is steady, and the useful details are in focus. Test the output on the mobile product page before buying equipment. A professional camera will not fix incorrect colours, missing angles, or a confusing crop.
Do all products need a white background?
No. A plain background makes the main item easy to compare and can satisfy channel requirements when configured correctly. Extra images can show size, texture, packaging, or real use. If you also submit images to Google Merchant Center, check its current main-image rules separately from your store's design choices.
How many photos should one product page have?
Use enough images to answer the buyer's real questions, not a fixed number for every SKU. A simple item may need a clear front view and one detail; clothing often needs front, back, fabric, fit, and each actual colour. Do not upload several near-identical photos that hide the information a buyer needs.
Should I use AI to alter a real product image?
Use editing to improve exposure and clean a background, but keep the sold item's colour, shape, included accessories, and condition truthful. A generated lifestyle scene must not imply that a component or feature is included when it is not. Compare the final picture with the physical item and label illustrative material where confusion is possible.
Written by
RA8M Team
Practical guides for restaurants, shops, and operations teams
Next step
Try RA8M with data close to your operation
Read next